I finally have some time to share my latest adventure in the pastry world... I had the privilege and honor to attend Chef Lucinda Larson's Cake Decorating class at Le Cordon Bleu: Seattle for the last 6 weeks. It was awesome, I had a great time learning without the pressure of having to worry about grades. I learned the basics on piping buttercreams, making borders, roses, mums and sweetpeas. My weakness in cake decorating has been with piping and making flowers out of buttercream. For our first cake project, it was a simple buttercream cake decorated with all decorations made out of buttercream.
We learned to make various types of buttercreams (Swiss, Italian and American), and some delicious fillings for our cakes. We were taught to make everything from scratch, marzipan, chocolate modeling class, sugar gumpaste, pas-tillage and our favorite fondant.
As we progress into each week, we were taught different mediums and at the end of each week was a cake project with requirements to incorporate what we had learned. It was incredible to see the variety of cakes and the creativity from all the students when we were given free reign to 'step out of the box'.
Our 2nd cake project... child birthday cake:
Our 3rd cake project... baby shower cake and cocoa painting:
Our 4th cake project... wedding cake:
Our final cake project... 'topsy turvy' cake:
All in all, Chef Larson's class set the foundation for all the students who wish to pursue a career in cake decorating. It had given me confidence and skills to prepared for an up coming wedding project in August of 2011. Stay tuned in 2011 for my next project.
Saturday, November 6, 2010
Sunday, July 18, 2010
Maintaining a sourdough starter...
is easier than one thinks. Once you have an established sourdough starter, all you have to do is feed it regularly. Depending on how often you want to bake, you want to 'refresh' it a day before you plan to bake. To refresh a starter, add in equal parts flour and water to your starter. Mix it well, it should have the consistency of thick pancake batter.
Where should one store a sourdough starter?
If you plan on baking fresh bread daily, you can just leave your starter on your counter. I would recommend a plastic container with a lid. You take out what you need for baking, and 'refresh' with equal parts flour and water, stir well and cover. It will be ready for your next day's baking.
For those who are weekend bakers like myself, I store my starters, yes, I have more than one, in the refrigerator. By storing the starter in the refrigerator, it stays fairly dormant, and need only to be 'refresh' once a week. A sourdough starter is pretty resilient, only way you can really kill it is by heat or by soapy residual left on your container or mixing spoon. I use a wooden spoon that is hand washed with no soap and only for the purpose of stirring my sourdough starters. Another tip is to leave wood utensils out of the dishwasher, wood acts like a sponge and tend to soak up all the soapy detergents in your dishwasher.
If you neglect your sourdough starter, when you open up your container, it will have a layer of watery gray liquid that smells like alcohol. It's still alive, it just need to be refresh. So simply pour out the watery liquid, throw away half of your starter and refresh it by adding in equal parts flour and water. It should wake it back up and you will be able to bake the next day.
How do I know if a starter has gone bad?
Your starter should have a clean, sweet smell, if it smells like mold or there is green and black stuff growing in it, throw it out. Somehow, a bad strain of yeast got into your starter and it is no longer fit for making bread.
Is bread the only baked item we can make with a sourdough starter?
The answer is no, there is so many possibilities, it is only what you limit your self to. I found a wonderful Sourdough Chocolate Cake recipe from King Arthur flour, you would not believe it was made with a cup of sourdough starter in it.
From Sourdough Chocolate Cake |
Sunday, July 4, 2010
Happy 4th of July!
It has been a busy baking weekend, we made 2 different cake recipes for a 4th of July BBQ party. Our two cake recipes came from 2 different sites, King Arthur Flour and California Olive Ranch. Both have excellent websites filled with delicious recipes for cooking and baking with their products.
The first cake we made was a Yogurt cake recipe from the California Olive Ranch website. This was my first attempt at making both cakes, the recipe called for a full fat yogurt, we used a Greek Style yogurt flavored with honey and strawberries from The Greek Gods. The honey and strawberries yogurt complimented the lemon zest well, so if you decide to follow the recipe on their website, it will also go well with the strawberries.
For the Sourdough Chocolate Cake Recipe, the complete recipe with directions and photos is available on the King Arthur Flour website. I did not used their recipe for making the icing, our family enjoys a more decadent indulgence in dark chocolate ganache rather than a sugary icing made with powdered sugar. Instead of baking it in a sheet pan, we baked ours in a bundt cake pan. Not much was changed from the original recipes aside from reducing a 1/4 cup of sugar from each cake recipe, we ended up with 2 delicious cakes that our family enjoyed.
Olive Oil Yogurt Cake
Ingredients:
* 3/4 cup sugar
* zest of 1 large lemon
* 1 1/2 cup cake flour
* 2 tsp baking powder
* 1/4 tsp salt
* 3 eggs
* 3/4 cup full-fat yogurt (Greek style yogurt)
* 1/2 tsp vanilla extract
* 1/2 cup Light Olive Oil
Directions:
Preheat oven to 350F degrees, reduce to 325F after cake is put into oven.
For the cake:
1. Lightly oil the sides of a 10" round pan with olive oil and place a parchment paper circle at the bottom of the pan.
2. Zest the lemon into the sugar. Use a fork or your fingers to rub the sugar and zest together to release the oils and fragrance into the sugar.
3. Whisk together the eggs, zested sugar, yogurt and vanilla.
4. Sift the flour, baking powder and salt into the egg mixture and stir. When the mixture looks fairly well blended, add the oil and stir to fully incorporate.
5. Pour into the prepared pan and bake for 20 to 25 minutes, test with a toothpick or skewer, it should come out clean.
6. Cool the cake on a cooling rack for about 10 minutes and invert out of the pan. Remove the parchment and let cake cool on rack completely. Wrap in plastic wrap and refrigerate overnight if you like.
Mango Mousse and sliced mangoes with fresh berries for topping
Ingredients:
* 1 cup heavy whipping cream
* 1 Tbsp sugar
* 1/4 cup full-fat yogurt (Greek style yogurt) (Honey and Strawberry flavor)
* 1/4 cup Mango puree
* 2 large ripe mangoes
* 1 cup fresh raspberries
* 1/2 cup blueberries
Preparations:
1. Peel and slice mangoes. With a knife cut as close to the pit on both sides as possible. Set the 4 panels aside to be sliced later.
2. Trim off the remainder of the flesh from the mangoes and put in a blender or a bowl to be pureed.
3. Pour the heavy whipping cream into a chilled bowl and whip until foamy, add in sugar and whip until stiff peaks form. Fold mango mixture and yogurt into whipped cream.
4. Spread 1/2 of the mixture on top of the cooled cake and put the remainder in a piping bag fitted with a large star piping tip. Chill in refrigerator.
5. Chill cake in refrigerator for 30 minutes.
6. Decorate cake with sliced mangoes and berries. Pipe the cream mixture to decorate the cake.
7. Chill cake in refrigerator for 30 minutes, slice and serve.
Happy baking!
Wednesday, June 23, 2010
Gluten free baking... saw this recipe in our newspaper...
and the photo was enticing me to try it out.
We don't have food allergies in our family but we have friends who have children with food allergies to peanuts, soy, wheat, eggs and dairy. The recipe is called Chewy Flourless Chocolate Cookies, it is gluten free and dairy free. The cookies have a soft and chewy texture and taste like a brownie.
Chewy Flourless Chocolate Cookies
Ingredients
1¾ cups powdered sugar
½ cup Dutch process cocoa (made with alkali)
2 teaspoons cornstarch
¼ teaspoon salt
2 egg whites
1 cup coarsely chopped pecans or walnuts, toasted
Instructions:
1. Preheat oven to 300F.
2. Mix together sugar, cocoa, cornstarch and salt. Gradually add egg whites, stirring with a spoon until mixture forms a dough. (Mixture should be thick enough to form into balls; if not add more powdered sugar and cocoa). Add nuts; mix well.
3. Form dough into 15 balls. Place on a parchment-lined cookie sheet. Bake 16 to 19 minutes, until glossy and crackled. Cool completely. Makes 15 cookies.
Recipe by Tamar Haspel, June 2010.
Nutritional Information
Per cookie: 110 calories, 7g fat, 0mg chol., 1g prot., 16g carbs., 1g fiber, 45mg sodium.
Saturday, June 12, 2010
Making Potato Gnocchi ...
not the easiest thing to make. As a student, we made these in class, they came out usually over kneaded so they had a rubbery texture or under kneaded falling apart in the water when they were boiled. Ours today turned out fine, not rubbery, could still be more pillowy. They were soft and edible.
Potato Gnocchi
Ingredients:
1-1/2 pounds russet potatoes, scrubbed
1 cup (or more) all purpose flour
1 large egg yolk, beaten to blend
Pinch kosher salt
Pinch of freshly grated nutmeg
Preparation:
1. Preheat the oven to 400 degrees. Pierce potatoes in several places and bake until soft, about 1 hour. Cool slightly. Cut potatoes in half. Working in batches, scoop hot flesh into potato ricer or food mill. Rice potatoes onto rimmed baking sheet and cool slightly.
2. Line large baking sheet with parchment paper and set aside. Prepare a work area and dust it with flour.
3. Transfer potatoes to large bowl. Add the flour, toss to coat. Form a well in the center of the potato mixture. Add the egg yolks, salt, and nutmeg. Stir with fork until the mixture is evenly moistened and mixture looks shaggy.
4. Turn the mixture out onto the lightly floured work surface. Knead dough until it comes together, sprinkling dough with flour very lightly only if dough is sticky. Form dough into ball; divide into 4 pieces. Roll each piece between hands and work surface into 3/4-inch-thick rope. Cut each rope into 3/4-inch pieces. Place gnocchi on prepared baking sheet. Using the tines of a fork or your fingertip, press lightly into each gnocchi, making an indentation in the pasta.
5. At this point, you can freeze the gnocchi by placing them into the freezer spread out on a baking sheet dusted with flour or lined with wax paper. Once frozen, place the gnocchi in a freezer bag. To cook them, place the frozen gnocchi into simmering water (next step).
6. Working in batches, cook gnocchi in a large pot of boiling salted water. Continue to simmer gnocchi until cooked through and tender, stirring occasionally, until they rise to the surface. Using a slotted spoon, transfer them to a bowl. Serve with your favorite warm pasta sauce.
The best gnocchi we had was at a little hole in the wall cafe at the base of Whistler, Dec. 2009. They were the melt in your mouth texture sauteed in pesto sauce with a dusting of Pecorino cheese.
Salute!
Friday, June 11, 2010
How to make Swiss and Italian Meringue Buttercream tutorial.
Once you learn the technique of making these two butter creams, you'll never go back to frosting out of a can. There are two basic techniques and they both involve cooking the egg whites. My method is to combine both the Swiss technique with the Italian technique.
Swiss/Italian Meringue Butter cream Frosting
Ingredients:
4 large egg whites (about 4 oz)
1 cup granulated sugar divided (1/4 cup and 3/4 cup)
1/4 cup water
1 lb or 4 sticks of unsalted butter (room temperature)
Directions:
1. Cut the butter into tablespoon-size pieces you can leave them on the wax paper or set aside in a medium bowl.
2. Put 3/4 cup of sugar into a heavy-bottomed 1-quart saucepan with 1/4 cup water. Gently stir to combine; I use the candy thermometer for this. Leave the candy thermometer in the saucepan, numbers facing down to balance the thermometer.
Place the saucepan with the sugar and water over medium-high heat. Partially cover with a lid to capture the evaporating water -- this helps to moisten the sides of the saucepan to prevent sugar crystals separating from the syrup.
3. Put the 1/4 cup sugar and egg whites in a mixer bowl, fit the bowl over a pan of simmering water and whisk constantly keeping the mixture over the the heat until it feels very warm and you don't feel any graininess from the sugar. (About 2-3 minutes.)
4. Put mixing bowl in a standing mixer fitted with the wire whip attachment set to medium then increase to high speed. When the whites are at stiff peak you have a meringue.
4. At the same time, the egg whites are whipping. Raise the heat to bring the syrup to 245F. When the syrup is at 245 degrees, remove the thermometer and slowly pour the syrup into the meringue while is it whipping. Aim for the space between the mixer bowl and the revolving wire whip or if you are like me, just pour it down the side of the mixing bowl. If you aim at the revolving whisk, you'll have to clean your bowl and start all over from the beginning.
5. After 1 to 2 minutes reduce the speed to medium for about 3 to 4 minutes or until the meringue is cooled.
6. Add the butter one tablespoon at a time. Increase the speed to high for one to two minutes to fully combine the butter with the meringue.
The following flavorings can be added to the base recipe for Swiss/Italian meringue butter cream for cupcakes or a layered cake.
1 teaspoon vanilla extract
1/2 cup bittersweet chocolate, melted
2 to 4 tablespoons (to taste) dark rum
2 to 4 tablespoons (to taste) amaretto
1/4 to 1/2 cup fruit puree (raspberry, strawberry, mango, etc.)
2 tablespoons lemon liqueur (lemoncello)
1 teaspoon orange oil or lemon oil
http://www.post-gazette.com/pg/07116/781000-107.stm
Tuesday, June 8, 2010
A good basic white cake recipe ...
for any celebration. This is my favorite recipe for a simple white cake. It is a moist and dense textured butter cake. It is a modified version from Dorie Greenspan's recipe "The Perfect Party Cake". The lemon cream filling is the perfect compliment to this cake. Fruit jams are also excellent fillings for this cake. My favorite jams have been Sunfresh Freezer jams, they come in many wonderful tasting flavors. I've also filled the cakes with a thin layer of chocolate ganache and a whipped mascarpone cream mousse with fresh berries.
The Perfect Party Cake
Ingredients:
2-1/2 cups cake flour
1 tbsp baking powder
1/2 tsp salt
1/2 teaspoon baking soda
1-1/4 cup buttermilk
4 large egg whites
1 cup sugar
2 tsp grated lemon zest
1 stick (8 tablespoons or 4 oz) unsalted butter (room temperature)
1/2 teaspoon pure lemon extract or vanilla
Directions:
Center a rack in the oven and preheat the oven to 350F. Butter two 9 x 2 inch round cake pans and line the bottom of each pan with a round of buttered parchment or wax paper. Put the pans on a baking sheet.
To Make the Cake:
1. Sift together the flour, baking powder, baking soda and salt.
2. Whisk together the milk and egg whites in a medium bowl.
3. Put the sugar and lemon zest in a mixer bowl or another large bowl and rub them together with your fingers until the sugar is moist and fragrant.
4. Add the butter and working with the paddle or whisk attachment, or with a hand mixer, beat at medium speed for a full 3 minutes, until the butter and sugar are very light.
5. Beat in the extract, then add one third of the flour mixture, still beating on medium speed.
6. Beat in half of the milk-egg mixture, then beat in half of the remaining dry ingredients until incorporated.
7. Add the rest of the milk and eggs beating until the batter is homogeneous, then add the last of the dry ingredients.
8. Finally, give the batter a good 2 minute beating to ensure that it is thoroughly mixed and well aerated.
9. Divide the batter between the two pans and smooth the tops with a rubber spatula.
10. Put cake into oven, turn down temperature to 325F. Bake for 30-35 minutes, or until the cakes are well risen and springy to the touch – a thin knife inserted into the centers should come out clean.
11. Transfer the cakes to cooling racks and cool for about 5 minutes, then run a knife around the sides of the cakes, unfold them and peel off the paper liners.
12. Invert cake and cool to room temperature, right side up (the cooled cake layers can be wrapped airtight and stored at room temperature overnight or frozen for up to two months.
Happy baking!
Sunday, June 6, 2010
A recipe for lemon cream cake filling...
it is a mixture created from a Lemon curd base or you can use any type of fruit curd you wish to make creamy for a cake filling. The creamy and light filling is a compliment to fresh seasonal berries. I like to spread a thin layer of lemon curd or jam to the cake layer, and then spread on a layer of lemon cream. From the photo below, I've added in fresh raspberries and blueberries.
Basic Lemon curd recipe:
Ingredients:
3 eggs
2 egg yolks
1 cup sugar
4 oz butter
3 oz lemon juice
Directions:
1. Combine butter, lemon juice and sugar in a bowl set on top of a pot of water. (Bain Marie or Double boiler method).
2. In a separate bowl, beat eggs and yolks together.
3. When butter is melted, whisk/stir in egg mixture.
4. Stir constantly until mixture thickens; Do Not Boil.
5. Pour mixture into a pan to cool and cover with plastic wrap to keep a skin from forming onto the surface of the lemon curd. Cool in refrigerator overnight.
Lemon Cream cake filling
Ingredients:
8 oz block of cream cheese (room temperature)
1 tbsp sugar
1/4 cup of heavy whipping cream
1/2 cup of lemon curd
Directions:
1. Using the paddle attachment, whip cream cheese and sugar until creamy, drizzle in the heavy whipping cream at medium low speed. It should resemble the creaminess of soft whipped cream.
2. Add in the 1/2 cup Lemon curd and mix until combine and no yellow streaks from the lemon curd is showing.
3. Use right away or store over night in refrigerator.
Saturday, May 29, 2010
A butterfly baby shower cake ....
for my friend LeAnne. We are celebrating the impending arrival of LeAnne and Pastor James' first baby. To wish the new "parents to be" many wonderful blessings for their impending delivery from the stork, the women at our church put on a shower for her and I got the task of making her a special cake.
The theme chosen was 'butterflies'. The sugar flower decorations were inspired by Jacqueline Butler, sugar artist from La Jolla, California, owner of Petalsweets. Her beautiful and lifelike bouquets inspired me to make some flowers for the butterflies.
The top and middle tier was a chocolate cake with a Chocolate Truffle cream cheese filling.(Recipe below) The bottom tier was a vanilla cake with a lemon curd and lemon cream and fresh berries filling. The entire cake was iced with a vanilla Italian Meringue butter cream frosting.
BHG Chocolate Lover's Cake
Ingredients:
* 3/4 cup butter
* 2 eggs
* 2/3 cup unsweetened cocoa powder
* 2/3 cup boiling water
* 2/3 cup buttermilk or sour milk
* 2 teaspoons vanilla
* 2-1/4 cups all-purpose flour
* 1-1/2 teaspoons baking soda
* 1/8 teaspoon salt
* 3/4 cup granulated sugar
* 3/4 cup packed brown sugar
Directions:
1. Let butter and eggs stand at room temperature for 30 minutes. Grease and flour two 9-inch round cake pans; set aside. In a medium bowl whisk together cocoa powder and boiling water until smooth. Let cool for 10 minutes. Whisk in buttermilk and vanilla; set aside. In medium bowl stir together flour, baking soda, and salt; set aside.
2. Preheat oven to 350F. In a mixing bowl beat butter with electric mixer on medium speed for 30 seconds. Add sugars; beat until combined. Add eggs, one at a time, beating until combined after each addition. Beat in one-third of the flour mixture on low speed just until combined after each addition. Beat in half of buttermilk mixture. Mixture may look curdled. Beat in half of the remaining flour mixture, then the remaining buttermilk mixture, and finally, the remaining flour mixture.
3. Divide batter between prepared pans, spread evenly. After putting cakes into the oven, lower the temperature to 325F. Bake about 30 minutes or until toothpick inserted near centers comes out clean. Cool in pans on wire rack 10 minutes. Remove cakes from pans. Let cool on wire rack.
Chocolate truffle cream cheese filling
* 1 cup heavy whipping cream
* 8 oz chopped bittersweet chocolate (61% cacao)
* 8 oz cream cheese room temperature (Trader Joe brand or Philly's)
Place chopped chocolate in medium bowl. Bring cream just to boil in heavy medium saucepan. Pour over chocolate. Let stand 1 minute, then stir until ganache is melted and smooth. Let remaining ganache stand at room temperature to cool until barely lukewarm.
Whip up the cream cheese add in 1/2 cup of ganache mixture. Mix until mixture thoroughly incorporated (no white streaks from the cream cheese) and chill for 10 minutes.
Finishing the cake:
Place a rack inside rimmed baking sheet. Carefully run knife around pan edges to release cakes. Invert 1 cake layer onto cardboard round or bottom of 8-inch-diameter tart pan with removable bottom. Peel off parchment paper. Place cake layer on round on prepared rack. Spoon dollops of chilled ganache in the center of the cake round, then spread evenly. Invert second cake layer onto another cardboard round or tart pan bottom. Peel off parchment paper. Carefully slide cake off round and onto frosted cake layer on rack.
Pour half of barely lukewarm ganache over cake, spreading over sides to cover. Freeze until ganache sets, about 30 minutes. Pour remaining ganache over cake, allowing to drip down sides and spreading over sides if needed for even coverage and to smooth edges. Freeze to set ganache, about 30 minutes.
Wednesday, May 19, 2010
More time to practice what I learned at the Artisan Bread class...
just when you think you know all about bread... there is just more to learn. I found that out when I attended the Artisan Bread baking class. I had always wanted to learn how to make Challah bread, last summer, I would look forward to paying $3.50 for a loaf at the local farmers market. Now, that I learned how to make the dough in class, I had struggle with shaping the loaf into a nice looking braid. Even in class, my braided loaf came out looking funny. To improve my technique, I made a full batch of dough, enough to make 6 loaves of bread and to give me enough practice to braid dough. And plenty of loaves to share with my neighbors and coworkers.
Challah Bread recipe (Cholesterol & Dairy Free)
Yield: 2 loaves at 450 grams each
516g Bread flour
23g sugar
10g salt
80g canola oil
17g fresh yeast
37g egg whites
23g pumpkin puree
200ml warm water to touch
Egg wash:
1 egg and 1 tbsp of water
For a more richer bread, replace the canola oil with butter and replace the egg whites and pumpkin puree with 1 egg.
Directions:
1. Put all ingredients in a large mixing bowl.
2. To make the dough: Combine all of the dough ingredients and mix and knead by hand, mixer, or bread machine, until you have a soft, smooth dough.
3. Allow the dough to rise, covered, for about 2 hours, or until it's puffy and nearly doubled in bulk.
4. Gently deflate the dough, and transfer it to a lightly greased work surface.
5. You may braid the challah the traditional way, into a three-strand braid. For a fancier presentation, make a four-strand braid, as follows. Divide the dough into four pieces, and shape each piece into a rough 6" log. Cover the logs with lightly greased plastic wrap or a proof cover, and let rest for 10 minutes.
6. Roll each log into a 15" rope. Cover, and let rest for 10 minutes.
7. Continue rolling the ropes til they're about 20" long; they'll shrink back to about 18" as they sit.
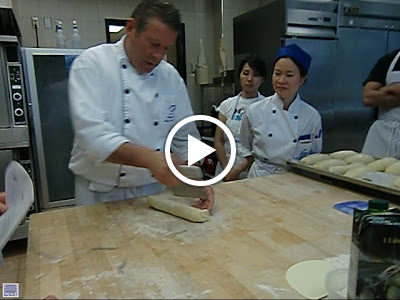
8. Braiding the dough, follow the video from my previous posting on how Chef Voss demonstrates how to make the 2 strand braid.
9. Gently pick up the loaf, and place it on a lightly greased or parchment-lined baking sheet. Cover the loaf with lightly greased plastic wrap or a proof cover, and let it rise till it's very puffy, 60 to 90 minutes. Towards the end of the rising time, preheat the oven to 375°F.
10. Whisk together the egg and 1 tablespoon water, and brush this glaze over the risen loaf.
11. Place the baking sheet atop another baking sheet; this will insulate the bread's bottom crust, and keep it from browning too much. Put the challah in the lower third of the oven, and bake it for 20 minutes. Tent the challah loosely with aluminum foil, and bake for an additional 25 minutes, until the loaf is golden brown.
12. Remove the bread from the oven, and place it on a rack to cool.
Reference photos and directions.
Sunday, May 16, 2010
Enjoyed taking an Artisan Bread Class ...
this weekend with my sister-in-law. It was girl's day out to have some fun baking time learning about baking artisan type breads. Our class was at the Pacific Institute of Culinary Arts located in Granville Island, in Vancouver, BC.
In the 6 1/2 hour class, Chef Alfred Voss taught us all we wanted to know about Artisan bread from making the sourdough starter, selecting ingredients, mixing, kneading, resting, proofing, shaping our doughs to baking them into breads.
We each came away from our day with 7 loaves of baked bread, a multigrain breakfast dough for baking in the morning and a small container of sourdough starter for our future bread making, along with recipes to make our breads at home. The best part is we came home with the confidence of making our own breads to feed our family and we had a fun time learning together.
In the 6 1/2 hour class, Chef Alfred Voss taught us all we wanted to know about Artisan bread from making the sourdough starter, selecting ingredients, mixing, kneading, resting, proofing, shaping our doughs to baking them into breads.
From Artisan Bread Class Video |
We each came away from our day with 7 loaves of baked bread, a multigrain breakfast dough for baking in the morning and a small container of sourdough starter for our future bread making, along with recipes to make our breads at home. The best part is we came home with the confidence of making our own breads to feed our family and we had a fun time learning together.
Wednesday, May 5, 2010
Happy Cinco de Mayo!!! To celebrate this holiday,
we decided to make homemade tortillas and guacamole to go with our dinner. Hubby has been under the weather for the past two days, otherwise our plan would be to head down to our favorite Mexican restaurant, Torero's to celebrate Cinco de Mayo.
When our family has a craving for Mexican food, we would make our usual meat filling in the form of ground beef or turkey, or buffalo. If we had more time, we would make carnitas. Then head down to Torero's and pick up a dozen hot flour tortilla and an order of spanish rice and sit down to dinner.
Flour Tortilla recipe:
Ingredients:
3 cups unbleached flour
2 tsp. baking powder
1 tsp. salt
4-6 Tbsp. vegetable shortening or lard (we used butter)
about 1 1/4 cups warm water
Directions:
Mix dry ingredients in a large bowl.
Add vegetable shortening or lard, we used butter. Or use a combination of half lard, half shortening.
Use a fork or a pastry cutter to cut in the shortening or just do it the old fashioned
way and use your hands.
Next add warm water a little at a time until your dough is soft and not sticky. You do
not need very hot water.
Knead the dough for a few minutes.
Divide dough to form about 12 small dough balls. Let them
rest for at least 10 minutes, longer if you like.
Preheat your pan.
Now you can roll out the dough with a rolling pin or use a tortilla press. Dust each ball with a little flour just before you roll them out. Lay the rolling pin in the center of the dough ball and roll up, center and roll down. It is good to lift the dough and turn it. Again, rolling pin in the center and roll. Roll them out fairly thin.
Lay your tortilla on the hot pan. It takes just a few seconds to cook. Flip to the other side. When they are done, it should have lots of nice brown speckles.
Place them in a towel or a tortilla warmer to keep them warm till they are ready to be served.
Enjoy and happy cinco de mayo!
Sunday, May 2, 2010
Taking a break from cooking this weekend...
instead we had dinner at our favorite Italian restaurant, Perche'No. It was great to see Chef David and the rest of his team again. It has been many months since I had completed my internship here. We were seated at a table right above the open kitchen and could watch the flurry of activity below.
For an authentic Italian meal and a place where you are treated like family, this is the place to go.
Buon appetito!
For an authentic Italian meal and a place where you are treated like family, this is the place to go.
Buon appetito!
Wednesday, April 28, 2010
We finished watching 'Julie and Julia' and was inspired ...
to try out Julia's recipe to make Boeuf Bourguignon, from her cookbook Mastering the Art of French Cooking. Everyone in the family pitched in to help create this special dish. The little guy is slowly learning his knife skills and the older one gets to lightly toss the meat in flour. Hubby gets to saute up the vegetables with the meat in the 'Dutch Oven', while I get to continue to brown up the chunks of beef chuck. Cooking together has it's benefits after a long day at school and work, in the end we all get to eat the fruit of our labor. A delicious meal to fill our hungry tummies.
Ingredients:
6 ounces bacon
1 Tbsp. olive oil or cooking oil
3 pounds lean stewing beef , cut into 2-inch cubes
1 sliced carrot
1 sliced onion
1 tsp. salt
1/4 tsp. pepper
2 Tbsp. flour
3 cups full-bodied, young red wine , such as a Chianti
2 to 3 cups brown beef stock or canned beef bouillon
1 Tbsp. tomato paste
2 cloves mashed garlic
1/2 tsp. thyme
Crumbled bay leaf
Blanched bacon rind
18 to 24 small white onions , brown-braised in stock
1 pound quartered fresh mushrooms , sautéed in butter
Parsley sprigs
Directions:
Remove rind from bacon, and cut bacon into lardons (sticks, 1/4 inch thick and 1 1/2 inches long). Simmer rind and bacon for 10 minutes in 1 1/2 quarts of water. Drain and dry.
Preheat oven to 450 degrees.
Sauté the bacon in the oil over moderate heat for 2 to 3 minutes to brown lightly. Remove to a side dish with a slotted spoon. Set casserole aside. Reheat until fat is almost smoking before you sauté the beef.
Dry the stewing beef in paper towels; it will not brown if it is damp. Sauté it, a few pieces at a time, in the hot oil and bacon fat until nicely browned on all sides. Add it to the bacon.
In the same fat, brown the sliced vegetables. Pour out the sautéing fat.
Return the beef and bacon to the casserole and toss with the salt and pepper. Then sprinkle on the flour and toss again to coat the beef lightly with the flour. Set casserole uncovered in middle position of preheated oven for 4 minutes. Toss the meat and return to oven for 4 minutes more. (This browns the flour and covers the meat with a light crust.) Remove casserole, and turn oven down to 325 degrees.
Stir in the wine, and enough stock or bouillon so that the meat is barely covered. Add the tomato paste, garlic, herbs, and bacon rind. Bring to simmer on top of the stove. Then cover the casserole and set in lower third of preheated oven. Regulate heat so liquid simmers
very slowly for 2 1/2 to 3 hours. The meat is done when a fork pierces it easily.
While the beef is cooking, prepare the onions and mushrooms. Set them aside until needed.
When the meat is tender, pour the contents of the casserole into a sieve set over a saucepan. Wash out the casserole and return the beef and bacon to it. Distribute the cooked onions and mushrooms over the meat.
Skim fat off the sauce. Simmer sauce for a minute or two, skimming off additional fat as it rises. You should have about 2 1/2 cups of sauce thick enough to coat a spoon lightly. If too thin, boil it down rapidly. If too thick, mix in a few tablespoons of stock or canned bouillon. Taste carefully for seasoning. Pour the sauce over the meat and vegetables. Recipe may be completed in advance to this point.
For immediate serving: Cover the casserole and simmer for 2 to 3 minutes, basting the meat and vegetables with the sauce several times. Serve in its casserole, or arrange the stew on a platter surrounded with potatoes, noodles, or rice, and decorated with parsley.
For later serving: When cold, cover and refrigerate. About 15 to 20 minutes before serving, bring to the simmer, cover, and simmer very slowly for 10 minutes, occasionally basting the meat and vegetables with the sauce.
Bon Appetit!
Sunday, April 25, 2010
Yesterday, I attended the Washington State Sugar Artist 2010 Annual Cake and Confectionary Show...
it's exciting to attend my first cake and confectionary show. I got to see my friend Barb compete in her first cake competition. She is another cake and chocolate enthusiast who enjoys making cakes and working with chocolate as a hobby. I was amazed at the popularity and the fabulous cakes and sugar art entries submitted at the competition.
The cake show had a variety of cake artist demo their 'talent'. I learned about a new medium call Chocolate clay to do modeling and create edible structure that would not normally hold up with fondant. There were demos on designing and how to build structure for extreme cake designs and working with hot sugar.
All it all, it was a good day of learning at the show and I got to gather many more tips to expand my interest in the hobby of sugar art.
Saturday, April 24, 2010
Saturday morning fun...
making homemade pretzels with the kids. I had a sour dough starter sitting in my frig for a long while, it looked like it was time to throw it out, it had this grayish alcohol smelling liquid floating on top of the doughy mixture. I dumped the liquid down the sink and scooped out the doughy mixture into a plastic container, added some flour and some water and gave it a good mixing (looked like pancake batter), covered it with plastic and left it on the counter over night. Lo and behold, the next morning, the doughy batter was all bubbly, it was still alive! So our fun begins. We doubled our recipe to make about a dozen pretzels.
Pretzel Recipe: Makes 6 pretzels
Ingredients:
5 oz water, lukewarm
.2 oz fresh yeast
4 oz Sourdough starter
1/2 tablespoon honey
10 oz bread flour
.2 oz kosher salt
1 oz granulated sugar
coarse sea salt for dusting or cinnamon and sugar
1 stick butter, melted
Directions:
1. Dissolve yeast in lukewarm water.
2. In a mixing bowl, whisk together dissolved yeast, sourdough starter and honey.
3. In a stand mixer fitted with the dough hook, combine bread flour, salt and sugar with the yeast mixture on low speed until it forms a rough ball, about 2 minutes.
4. Switch to medium speed and mix until dough feels firm and bouncy to the touch, about 8 minutes.
5. Place dough on a lightly floured surface and knead until the dough forms a smooth ball.
6. Place dough in a bowl lightly coated wih pan spray, cover loosely with plastic and let it rest util double in size.
7. Portion the dough into 4 oz pieces.
8. Roll each piece into a rope 24" long, shape like a pretzel by forming an 8 shape with 2 loose ends of rope hanging in the center. Set aside and allow pretzels to rest for 30 minutes or so.
Baking Soda Hot water bath
1/3 cup baking soda
4 cups Hot water
Preheat oven to 375 Degrees F.
9. Line baking sheets with parchment paper.
10. Dip pretzels in to Baking soda hot water bath and set on baking sheets leave at least 2" between pretzels.
11. Bake for 10 minutes and rotate tray of pretzels around and bake until light golden brown approximately 5-10 minutes or so.
12. Brush pretzels with melted butter. Optional: sprinkle with cinnamon and sugar.
Enjoy!
Saturday, April 17, 2010
I couldn't pass up Bon Appetit's May 2010 issue...
our family has a weakness for pasta and bacon. And this one was no exception, the cover of the May 2010 issue of Bon Appetit feature a photo of a delicious plate of fettuccine with asparagus, peas and pancetta. Pancetta is the Italian version of you guess it, BACON. We ran out of time to make fresh fettuccine, instead we had 2 bags of organic penne pasta. Next time we try this recipe again, we'll make some fresh fettuccine. It turned out pretty easy and quick to make and the kids just loved it. We served it with some warmed crusty bread from Macrina Bakery.
Ingredients:
12 ounces fettuccine or penne
3 ounces pancetta or bacon, chopped
1 1/4 pounds asparagus, trimmed, cut on diagonal into 1-inch pieces
2 cups shelled fresh green peas, blanched 1 minute in boiling water, drained, or frozen peas (do not thaw)
1 bunch green onions, thinly sliced, white and pale green parts separated from dark green parts
2 garlic cloves, pressed
1/2 cup finely grated Parmesan cheese plus additional for serving
1/3 cup heavy whipping cream
3 tablespoons extra-virgin olive oil
3 tablespoons fresh lemon juice
1 tablespoon finely grated lemon peel
1/4 cup chopped fresh Italian parsley, divided
1/4 cup thinly sliced fresh basil, divided
Directions:
Cook pasta in pot of boiling salted water until just tender but still firm to bite. Drain, reserving 1/2 cup pasta cooking liquid. Return pasta to pot.
Meanwhile, cook pancetta in large nonstick skillet over medium heat until crisp. Using slotted spoon, transfer pancetta to paper towels to drain. Pour off all but 1 teaspoon drippings from skillet. Add asparagus to drippings in skillet; sauté 3 minutes. Add peas, white and pale green parts of green onions, and garlic; sauté until vegetables are just tender, about 2 minutes. Remove from heat.
Add vegetable mixture, 1/4 cup pasta cooking liquid, dark green parts of green onions, 1/2 cup Parmesan, cream, olive oil, lemon juice, lemon peel, half of parsley, and half of basil to pasta. Toss, adding more cooking liquid by tablespoonfuls if needed. Season with salt and freshly ground black pepper. Transfer to large bowl. Sprinkle pancetta, remaining parsley, and basil over. Serve, passing additional Parmesan cheese.
Read More http://www.epicurious.com/recipes/food/views/Fettucine-with-Peas-Asparagus-and-Pancetta-358490#ixzz0lPfiPKko
Sunday, April 4, 2010
A Master Recipe for Sweet Bread ...
to make many type of yummy sweet buns. This recipe was my first introduction to making wonderful breads. It has been well tested with my family, friends and coworkers, in the first few months after my class with King Arthur flour, I made 12 batches of this dough, mainly in the form of cinnamon rolls. While attending baking class at Le Cordon Bleu, I learned another simple sweet dough recipe, but my original recipe is still hands down the best according to the kids who are my best taste testers when it comes to eating cinnamon buns. So here it is for you to try.
Makes 2 loaves or one 9 X 13 pan of cinnamon buns
4 1/2 tsp active dry yeast or 4 tsp instant yeast
1/2 cup warm water (95 deg F)
1 tsp sugar
1/2 cup All Purpose Flour (King Arthur brand)
1 cup whole milk, scalded
1/4 cup butter
1 tsp salt
1/2 cup sugar
2 tsp vanilla
2 eggs, lightly beaten
4 1/2 to 5 1/2 cups All purpose flour
Filling:
2 tbsp butter, softened
1/2 cup brown suger, firmly packed
1 tbsp cinnamon
or
1 jar Nutella
2-4 oz finely chopped dark chocolate
Directions:
In a small bowl, combine the yeast, warm water, 1 tsp sugar and 1/2 cup flour. Cover with plastic wrap and set aside in a warm area until bubbly and very active about 10 - 15 minutes.
Scald milk, pour into large mixing bowl, add butter, salt, vanillar and beaten eggs. Stir to melt the butter. When the mixture is lukewarm, add in the yeast mixture and mix together.
Add flour, one cup at a time, until the dough comes cleanly away from the sides of the bowl. Turn the dough out onto a lightly floured surface and scrape out the bowl. Lightly oil the bowl and set aside.
Knead the dough, using only enough flour to keep the dough from sticking to your hands and the board. The dough should be soft and pliable, and not sticky. (The secret to a soft, tender bread is a soft dough.)
Place dough into the oiled bowl, turn to oil all surfaces and cover with plastic wrap and set aside in a warm place for about 45 minutes or until doubled. Punch down dough and round into a ball.
Roll dough out into a rough rectangle roughly about 12 X 9 inches and 1/4 inch thick. At this point you can spread on the brown sugar, butter and cinnamon filling for cinnamon rolls or break open a jar of 'Nutella' and spread it on, then sprinkle over that with chopped dark chocolate. Roll up like a jelly roll, starting with the long side. Cut the roll into 12 slices at least 1 inch wide. Place the slices, cut side down in a prepared 9 X 13 pan. Cover with plastic and let rise until doubled. Brush the tops of the buns with milk. Bake in a preheated 350 degrees F oven for 20 to 22 minutes or until golden brown.
Sunday, March 21, 2010
Another one of those busy weekends...
it has been a while since I've posted, lost my camera a few weeks ago at the 2010 Winter Olympics up in Vancouver. Hubby was so wonderful to find me a replacement, to get me back on track.
Am finally recovered from a cold, lost my all my taste buds and all motivation to cook or bake, only wanted to sleep in the last 2 weeks. This weekend, I got back on track with baking, sparing a few disasters, we manage to get 2 desserts done and donated for the 2010 SCS Dessert Auction.
I had a fun time playing with hot sugar and made some caramelized pecans and made spun sugar to decorate the Chocolate Turtle Tart.
Saturday, February 20, 2010
Braising cross cut veal shanks ...
to make Osso buco. It was a treat to be able to make Osso buco because veal is quite expensive, regular price $7.99/lb at my local Safeway. This morning, I got them for 50% off in the sale section. I learn something new today, our local Safeway, will put their meats in the sale area on the morning of the 'sell by date' if it doesn't sell. I was able to make 4 servings of Osso buco for about $20.
It smell so delicious when I took it out of the oven.
Tuesday, February 16, 2010
Introducing a new cookie...
my son calls it the Boy Scout's Turtle Cookie. The cookie experiment came about with the timing of the Girl Scout's annual cookie sale. One of our family's favorite is the toasted coconut caramel and chocolate cookie called the 'Samoas'. We have included a link to a Samoas recipe from Nicole's Blog site call Baking Bites Nicole has many other wonderful recipes, including recipes from other 'Girl Scouts' cookies.
This is a 3 part recipe for making this cookie. The cookies are fairly time consuming to make, if you take your time and have fun, the results will be well worth it. Your time will be well rewarded.
Step 1: Shortbread Cookie base recipe
1 cup unsalted butter, soften
1/2 cup sugar
2 cups AP flour
1/4 teaspoon baking powder
1/4 teaspoon salt
1/2 teaspoon vanilla extract
1/4 cup finely chopped toasted pecans
up to 2 tbsp milk
1. Cream together butter and sugar in large mixing bowl.
2. Mix in sifted flour/baking powder/salt at low speed, followed by vanilla and milk as need. Add in finely chopped pecans.
3. The dough should come together as a not too sticky ball.
4. Place the dough on a large piece of parchment or wax paper.
5. Smooth and shape the dough into an evenly shaped log that is about 8 inches long. Then thoroughly wrap the shaped log in the parchment or wax paper, twists the ends of the paper to seal the log, and place in the refrigerator to chill for at least three hours, or up to three days. (The log can also be frozen for about one month. If freezing, it is best to let the log stand at room temperature about 15-20 minutes before slicing.)
6. Preheat oven to 350 degrees F with the rack in the center of the oven. Line two baking sheets with parchment paper.
7. Using a thin bladed knife, slice the log into 1/4 inch (5 mm) thick slices. Place the cookies on the prepared baking sheets, spacing about 2 inches (5 cm) apart. Bake for about 10 minutes, or until lightly browned. Remove from oven and cool completely on a wire rack.
Caramels
2 cups white sugar
1 cup packed brown sugar
1 cup corn syrup
1 cup evaporated milk
1 pint heavy whipping cream
1 cup butter
1/2 teaspoon sea salt
1 1/4 teaspoon vanilla extract
1. Grease a 8"X8" pan or line the pan with parchment paper.
2. In a medium-size pot, combine sugar, brown sugar, corn syrup, evaporated milk, whipping cream, and butter. Monitor the heat of the mixture with a candy thermometer while stirring. When the thermometer reaches 250 degrees F (120 degrees C) remove the pot from the heat.
3. Stir in vanilla. Transfer 1/2 of the mixture to the prepared pan and let the mixture cool completely. When cooled cut the Carmel into small squares and wrap them in wax paper for storage.
Step 2: Caramel Coconut topping with toasted pecans
1/2 pan of Caramel recipe
1 cup toasted unsweetened shredded coconut
2 cups toasted pecans halves
For the Caramel Coconut topping, add the following to the caramel mixture left in the pot:
1 cup shredded toasted unsweetened coconut**
**For toasting coconut, preheat oven to 300 degrees F. Spread coconut on a parchment lined baking sheet with sides and toast 20 minutes, stirring every 5 minutes, until coconut is golden. Cool on baking sheet, stirring occasionally. Set aside.
1. While caramel/coconut mixture is still warm, use a small offset spatula to spread the mixture on the center of the shortbread cookie base.
2. Pat on the toasted pecans on top of warm caramel mixture.
3. While the caramel/coconut and pecans set up on the cookie base. Prepare the chocolate topping.
Step 3: Chocolate coating:
8 ounces chopped dark or semisweet chocolate chips
1. Melt chocolate in a small bowl. Heat on high in the microwave in 45 second intervals, stirring thoroughly to prevent scorching. Dip the base of each cookie into the chocolate and place on a clean piece of parchment paper. After dipping all the cookies, transfer the remaining chocolate to a small Ziploc sandwich bag with the corner snipped off and drizzle finished cookies with chocolate.
2. Let chocolate set completely before storing in an airtight container.
The recipe makes about 3 dozen cookies.
Sunday, February 14, 2010
Making BBQ pork buns with mom...
for Chinese New Year. Usually mom doesn't like to do much cooking for Chinese New Year, and for New Year's Eve, it has been a family tradition to go out to a restaurant for dinner. However this year was an exception, her favorite Chinese restaurant 'V Garden' went up in flames in mid January. She kept things simple, we had prime rib roast, roast chicken, steamed Sockeye Salmon with ginger, soy and scallions, sauteed Gai Lan (Chinese Broccoli) with oyster sauce and black bean crab over a bed of bean thread noodles.
For fun, she wanted to learn how to make BBQ Pork buns, only because the week before, I made a batch of chocolate and Nutella buns and baked them in her oven. The light bulb went off and she thought, "hey we can use the same dough to make BBQ Pork buns." Dad contributed to mom's cause by making the BBQ pork filling, he diced up the BBQ pork, mixed it up with some sauteed translucent diced onions and created a slurry of oyster sauce, Hoisin sauce, sugar, cornstarch, and water.
The recipe for the dough is a simple bun recipe from King Arthur Flour. It is an egg free and soy free recipe. The only changes to the recipe we tweaked was to brush the proofed buns with a mixture of 2 parts milk to one part water and after baking the bread for 20-25 minutes to brush the buns with the melted butter mixed in with an addition of a teaspoon of honey and tablespoon of hot water. Brush on the mixture and let the buns bake in the oven for 8-10 minutes. Remove the buns from the oven and give it one quick brush of the same mixture and let them cool down before serving. As you can see from the photos, mom was pleased with her tray of buns, she counted 27 buns.
I found it to be a great versatile bun recipe for eating on it's own or filled with whatever your taste buds desire. My weakness is usually dark chocolate and Nutella.
Friday, February 12, 2010
Valentine's Day party preparation...
it's that time of the year again, hearts and sweets for your sweeties. We only had one set of cards to do this year, our third grader decided that we should make some cookies to include with his cards. What a cute idea. While perusing the internet for a simple cookie recipe that would look cute and easy for him to tackle, we found a simple Icebox Cookie recipe from Joy of Baking.com. We had all the ingredients except for the candied red cherries, I looked all over town for those cherries, usually they are in an abundant supply right before the Christmas holiday for baking the infamous fruitcakes. Now in February, none can be found, so another internet search on what to substitute for the red cherries. I happen to find a recipe for making your own red glace cherries from a jar of maraschino cherries.
Just sharing some photos of how his cookies and cards turned out.
Happy Valentine's Day!
Just sharing some photos of how his cookies and cards turned out.
Happy Valentine's Day!
Saturday, January 30, 2010
Teaching the kids how to make cookies...
this weekend. We made 3 different types of cookie doughs using the same creaming technique that I learned in Chef Moore's baking class. I figured if the kids liked to have homemade cookies, they needed to learn the technique so they can make their own cookies when I am busy and don't have time. We made good progress, they quickly learned how to measure out all the ingredients before they start mixing.
My older one made progress in creaming the butter and sugar. The little guy made progress in cracking all the eggs, no egg shells in the batter or eggs on the floor. When we got done, we had 3 batches of cookie dough resting in the refrigerator. We made a batch of Oatmeal Raisin, White Chocolate and Macadamia Nut, and Chocolate Chip Pecan. The recipe for the White Chocolate and Macadamia is the same as the Chocolate Chip Pecan, except we replaced the chocolate with 'Guittard' brand white chocolate chips and the pecans with macadamia nuts.
While our cookie dough was chilling in the frig, we made a batch of Caramels for making Turtles.
After the dough had time to chill, we we're able to bake up a test batch for dessert. It was all yummy goodness especially for my two 'Cookie Monsters'.
Four-Star Chocolate Chips Cookie Recipe
1 ¼ cups All Purpose Flour
1 cup roughly ground rolled oats or ‘Quick oats’
1 teaspoon baking soda
1 teaspoon salt
1 cup (2 sticks) of unsalted butter, softened
½ cup brown sugar
½ cup granulated sugar
1 teaspoon vanilla extract
2 large eggs
2 cups chocolate chips
1 cup pecans
½ cup golden raisins or Trader Joe’s Golden Berry Blend
1. In a small bowl, combine the flour, baking soda and salt. Set aside.
2. In a large mixing bowl, cream the butter, sugar and vanilla with an electric mixer or a wooden spoon. Add the eggs, one at a time, beating well after each addition.
3. Gradually beat in the flour mixture. Stir in the chocolate chips, nuts, and raisins.
4. Cover and refrigerate over night.
5. Preheat oven to 350 degree F.
6. Scoop dough with tablespoon portion scoop, form into balls and place on cookie sheet lined with parchment paper or ‘silpat’.
7. Bake 9-11 minutes or until golden brown. Let cookies rest on the baking sheet for 2 minutes before removing with a spatula to wire racks to cool completely.
Makes about 60 cookies.
Saturday, January 23, 2010
On a noodle adventure...
last week we had some wonderful hand shaven noodles at a placed called Shanghai Cafe near Factoria Mall in Bellevue, WA. We tried the hand shaven noodles cooked in 3 different methods, in a clear broth soup, stir fried with chicken and seafood and the famous hand shaven barley green noodles stir fried with chicken. All of it was quite delicious and flavorful. The noodles had the slight chewiness and texture to them. So this weekend with some time on my hand, I decided to try a recipe to make Fresh Udon Noodles.
It is quite an interesting recipe, and you can involve the kids with their help to step on the dough to flatten it. The recipe make about 2lbs of noodles, more than enough to satisfy a family of 5. With the help of a hand cranked pasta machine, we rolled out the sheets of dough and used the fettuccine cutter to cut the noodles out.
We boiled our noodles up and served it in a hot bowl of chicken broth with shredded pieces of Kahlua Pork and bok choy. I also used a portion of the dough and made hand shaven noodles to stir fry up with chicken and bok choy. Both dishes came out tasting delicious.
Sunday, January 17, 2010
It's a double header weekend...
just like baseball, I have those weekends when I have back to back projects lined up. This weekend was to create 2 different cakes for 2 special people. My first project was a whimsical "Smurf" house cake. The theme of the 'smurfs' carried over as a joke from 2 years ago when I made a birthday cake for my cousin Henry. Every time we talk about birthdays, everyone in our family brings up the "smurf blue" cake.
So this year for his birthday, I made him a "Smurf" House cake, complete with mini mushrooms and a miniature 'Smurf' that Evan modeled out of Crayola non toxic clay. The whole cake is a vanilla cake, the roof is filled with Marionberry jam and Meyer lemon cream filling. The house is filled with sliced fresh strawberries and cream.
The other cake is for a special lady who officially returns home today. It is a welcome home cake for my co-worker Tom and his wife, Sue. Sue had her transplant operation last year and had to live near the hospital for several months. She was given the green light by the doctors to be able to return home this weekend. Her cake is vanilla cake with Meyer Lemon cream and marionberry jam filling.
Making Mrs. Small's cake gave me the opportunity to practice my spatula icing skills. It is one of those skills that takes lots of practice to get a smooth cake, and I still have a long ways to go to get there. My favorite part of cake decorating is gumpaste flowers. I could spend hours making individual flowers and assembling them into corsage sprays to put on cakes.
Saturday, January 9, 2010
Flight testing a new cake pan...
sounds kind of strange. What would one mean by flight testing... we'll with the Boeing 787 taking it's first flight last December. I thought I'd 'bake' test the Cocoa-Buttermilk Birthday Cake recipe from Dorie Greenspan's cookbook "Baking From My Home To Yours" in a newly acquired cake pan from Sur La Table.
The sales lady at Sur La Table did tell me that the stainless steel pan is a mold pan and not meant for baking. My response was... it's stainless steel, just like my mini madeleine pan from France. As long as I grease it really well, I should not have a problem getting the cake out. Sure enough, the cake came out of the pan without a hitch. Now my dilemna, how and where can I split the cake and fill it? After pondering for a few minutes, to keep it simple, I decided to leave it as is and just soak the cake with some simple syrup and enclose it in a layer of chocolate ganache. Nothing fancy this will have to do for now, the other option was to make a pan of 'Jello' in it. And Jello is not an option for a birthday celebration.
Hopefully the little chocolate airplane cake will be a nice birthday surprise for Jason. Jason is currently flying airplanes for Delta and someday aspires to be a test pilot for The Boeing Co.
Subscribe to:
Posts (Atom)